Wednesday, November 18, 2020

Getting a Credit Card without Credit History

Getting a credit card in United States without Credit History is like Chicken and Egg problem. You cannot get a credit card without having a good credit history and you cannot have a good credit history without having a credit card.

Unlike many countries where Credit Card is not so common, people in United States heavily rely upon their Credit Card. Even Financial Institutions offer incentives for paying with Credit Cards. Credit card comes with a lot of advantage when managed properly. You can get great cash back offers, discounts and even special privileges like Rental Car Insurance, Lounge Access, Invites for special events etc. This article is not about advantages of having Credit Card, rather it is about getting one.


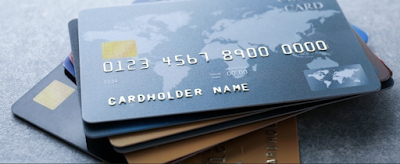
Image of Credit Card


Credit cards are akin to cellphones, you just need it. It is no more a privilege. It is a basic necessity when living in United States. You can probably manage without having a cellphone but not without a Credit card. One may argue that you can manage with debit card, cash or PayPal/Zelle etc, it is like saying I can manage without a phone (Even basic one be it fixed line/land line or non smartphone ). Sure you can, but you are inconvenienced for sure. May be in 8-10 years from now, things may change where every one is paying in Digital Currency like Bitcoin etc. but not at the moment Credit Card rules the market.

Anyways if you are like me who moved in to US and struggling with the chicken and egg problem of figuring out the credit card and credit history etc. and been running around checking with banks/financial institutions for getting a credit card, then you have to come to the right place. If you have come to US as student then you should not have any problem as you will be able to get a credit card based on backing of your educational institution. Almost all colleges have tie ups with some or the other major credit card companies and they will even facilitate to get one during onboarding.  

 There are 2 ways I would recommend in getting a Credit Card without Credit History.

1. Secured Credit Card : Many banking institutions offer something called secured credit card where you have to deposit cash first and then based on the value of the deposit, a secured credit card is issued to you with a limit equivalent to your deposit. The pre-requisite is that you have to open an account with them and make a minimum deposit which covers security deposit for your account and credit card. Though the minimum deposit imposed by bank may not be much, would recommend depositing as much as you can as the maximum limit on the card is equal to secure deposit value and typically to build a good credit history, would recommend not to spend more than 30-40 % of available credit. Would recommend you to deposit at least $500-1000 to cover your monthly household expenses from your Credit Card. This secured credit card will have several benefits as well similar to a regular/unsecured credit card like cash back, rental car insurance etc. and at the same time help you build your credit history. Word of caution while spending on credit card as interest rate and late payment fees are usually much higher compared to a regular/unsecured credit card and you may end up paying unnecessary charges for your own moneyed this may affect your credit score as well. 

Usually the secured credit cards have lock in period of 6 months - 1 year by which you have will have opportunity to show financial discipline, reliability, credibility by make timely payments and not over spending etc. By the end of this lock in period if you have good credit history (Credit Score) established, then these institutions will return your deposit amount in full to your bank account and then increase the available limit of your credit card and decrease the interest rate, late payment charges etc. 
 
If you do not have sufficient funds to make a deposit for secured credit card or not in a position to make a deposit to start with then #2 is the best option for you to get a credit card and credit history

Some of the major Banks offering Secure Credit card are : Bank of America (Recommended), Discover, First Progress, Open Sky etc.

Link to Apply for Bank of America Secured Credit Card: 

https://www.bankofamerica.com/credit-cards/products/secured-credit-card/ 


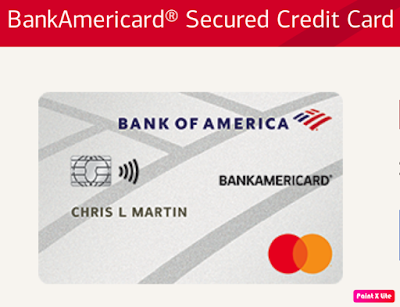
Image of Bank of America Secured Credit Card


2. Credit Unions : Credit unions are non-profit entities which are managed by members of the entity/union. Credit unions operate to help and cater to well being of members. Profits made by credit unions are usually used passed on to the member in the form of reduced fees, lower interest rates and higher savings rate etc. Unlike Banks, Credit Unions are governed by members and are usually very flexible and accommodative for new members without credit history.

There are many credit unions like ALLIANT, Baxter Credit Union (BCU), Digital Federal Credit Union (DCU) etc. who offer credit card once you become their member by paying a small fee (Usually $5 - $25) and open a checking account with them. Usually they offer a low interest credit card while charging low or no annual fees for credit card. The interest rates and late payment fees etc. also are lower compared to major banking institutions simply because it is not for profit organization. You will be able to get a basic credit card once you provide proof of employment, ID etc. The benefit offered by these credit cards usually are limited and do not provide many of the privileges doled out by the regular Credit Card companies. In fact most employers have a tie up with some or the other Credit Union or may have one of their own and going with these Credit Unions is lot easier and get higher limit on the credit card.

Once you have managed to establish a good credit score with your credit union credit card, you can apply for unsecured/regular credit card from banking/credit card institutions depending on wich card is best for your use or continue with your credit union credit card as depending on your credit score, income and usage, available credit limit also is increased from time to time.


Hope this article helped you in getting your first credit card and build your credit history. If you enjoyed reading this post or if this post was helpful to you please leave your comments for more such posts.

Disclaimer: The information in this blog post (“post”) is provided for general informational purposes only, and may not reflect the current law in your jurisdiction. No information contained in this post should be construed as legal advice nor is it intended to be a substitute for legal counsel on any subject matter. No reader of this post should act or refrain from acting on the basis of any information included in, or accessible through, this Post without seeking the appropriate legal or other professional advice on the particular facts and circumstances at issue from a lawyer licensed in the recipient’s state, country or other appropriate licensing jurisdiction.


Saturday, January 5, 2019

L2 EAD - An Opportunity for Spouse of L1 VISA Holders to work in U.S.A

L2 Employment Authorization Document (EAD) is a work authorization provided by the U.S. Citizenship and Immigration Services (USCIS) to Spouse of L1 VISA holders.
EAD allows the spouse of L1 VISA holders an opportunity to work in the United States till the L1 VISA is valid.
Here are the list of documents that are required to apply for L2 EAD or L2 EAD Renewal.
  • Form I-765 - L2 EAD Application form - Mandatory (Read Instruction Sheet before filling in the form)
  • Form G-1145 -  To request a text message and/or email when USCIS accepts your application form - Optional (Recommended)
  • Photo Copy of Passport (Spouse and Self )- Mandatory
  • Photo Copy of L1 and L2 VISA - Mandatory
  • Copy of I-94 - Arrival/Departure History (Spouse and Self ). You can retrieve your latest I-94 from the CBP site  : https://i94.cbp.dhs.gov/I94/#/recent-search   - Mandatory
  • Photographs 2x2 with white background (Self) - Mandatory
  • USCIS Filing Fee - Money Order or Cashier's check or Personal Check (Recommended). Currently $410 without bio-metrics. Bio-metrics is required if this is not captured at the time of VISA. ($85 - Bio-metrics fee). Fees may vary from time to time. Please verify before filling in the check here : https://www.uscis.gov/i-765 - Mandatory
  • Photo Copy of Marriage Certificate - Optional (Recommended)
  • Photo copy of I-129S (Petition) of L1 VISA Holder  - Mandatory
  • Photo copy of Offer Letter of L1 VISA Holder - Optional (Recommended)
  • State Driving License or Identification Card - Optional (Recommended)
  • Photo Copy of Current L2 EAD Card - Mandatory & Applicable only for L2 EAD Renewal
  • Cover Letter indicating your intention to work and why you deserve the EAD and the list of documents enclosed -  - Optional (Recommended)
The forms I-765, G-1145 can be downloaded from USCIS site - https://www.uscis.gov/i-765 
Always ensure that you download the latest forms even if they appear to be same as previously downloaded form as the forms are changed from time to time and the application will be rejected if older version of form is submitted.

Filing Method : Electronic or Paper. Paper based is recommended as even for Electronic method, application is deemed to be accepted only after receipt of paper documents via mail.

Mail/Courier: USPS Priority Mail  Express is Recommended as the delivery is fastest, package can be tracked, and cheaper compared to private ones like FedEx or UPS.

To Address: This will be the address of USCIS Phoenix and Dallas Lockbox facilities. Address for lock box facilities will vary based on the state you live and Courier Service you use. Please refer to this link before writing down the address - https://www.uscis.gov/forms/forms-information/uscis-phoenix-and-dallas-lockbox-facilities 

Once you post all the documents along with your application you will receive e-notification (Acknowledgment and Receipt Number) on email or phone if G-1145 is submitted along with the application within 4-7 Business Days. You will also receive Acknowledgment receipt via mail within 2-3 weeks on the address mentioned in the form or rejection letter if there are any issues in the application.

Time Frame:  The processing time varies anywhere from 2 months to 9 months depending on processing center and you can determine this based on first three characters of the receipt number.
You can check the approximate processing time of your application from the USCIS site https://egov.uscis.gov/processing-times/ 
  • EAC – Vermont Service Center
  • WAC – California Service Center
  • LIN – Nebraska Service Center
  • SRC – Texas Service Center
  • YSC – Potomac Service Center
  • MSC – National Benefits Center
Status/Tracker: L2 EAD Status can be checked by either signing up on USCIS Site (Recommended as more accurate and latest ) or on USCIS Site - https://egov.uscis.gov/casestatus/landing.do 

You can submit a Service Request to USCIS if you do not receive notice/ EAD card within stipulated time - https://egov.uscis.gov/e-Request/Intro.do 

Additionally you can seek help from your local congressmen if processing times have passed and you have not received your EAD. You can find who your local congressmen is from this link by providing your zip code.


Hope this article helped. Please leave your comments if this post helped you and want to see more such posts.

Disclaimer: The information in this blog post (“post”) is provided for general informational purposes only, and may not reflect the current law in your jurisdiction. No information contained in this post should be construed as legal advice nor is it intended to be a substitute for legal counsel on any subject matter. No reader of this post should act or refrain from acting on the basis of any information included in, or accessible through, this Post without seeking the appropriate legal or other professional advice on the particular facts and circumstances at issue from a lawyer licensed in the recipient’s state, country or other appropriate licensing jurisdiction.


Sunday, November 5, 2017

My Gateway to the U.S - L1B Blanket VISA Interview Experience

Annually approximately 37 million people from across the world visit the United States of America for business or work or studies or personal purpose. Everyone's gateway to the U.S is a VISA. There are 185 different types of VISA and broadly fall under Immigrant or Non-Immigrant VISA.
  • Non-Immigrant VISA - for temporary visits such as tourism, business, work or studying.
  • Immigrant VISA - for people to immigrate to the United States. 


My gateway to the U.S was L1B Blanket VISA which was filed by my Employer based on my specialized knowledge of proprietary application. (Refer Wiki VISA for more details of VISA types)
The overall processing time before I got an appointment for Bio-metric and VISA Interview was approximately 4 months. I had my Bio-metric and VISA Interview appointment at U.S Consulate Chennai, India in the month of March, 2017. Read on further to know my experience of these in detail.

Biometric Appointment: 22nd March 2017 3:00 pm IST at U.S Biometrics center on Kodambakkam High Rd, Nungambakkam, Chennai, India

I reached the biometrics center by 2.20 pm. Luckily I did not have to run around last minute near the U.S Consulate to leave my phone with someone reliable or some place safe unlike most people who had to leave their phone with a street vendor for INR 10.00. I was instructed by Immigration Department (Employer) not to carry any electronic devices including cellphone and so I had left the same in my room at the Hotel. I carried all the required documents including DS-160 and Indian Passport. I had verified all my documents many times so I did not have any trouble getting inside unlike few unfortunate ones where details on their DS-160 did not match with that on their Passport and other documents and had to go outside and get a new corrected DS-160 from the agents around the U.S Consulate Office at very high price (~ INR 2000 for one DS-160). This was the case more with the aged parents who were not familiar with the process and were there for Tourist VISA to visit their children in the U.S. 

I was on the queue for my slot and was let in around ten minutes before my slot time, once everyone in the previous slot were in. My documents was verified inside and was made to stand in another queue for photo and fingerprints collection. The entire process took around 30 minutes and I was handed over my passport with a small sticker at the back and instructed not to remove it till VISA Interview. I was outside the building completing the entire process by 3.30 pm.

VISA Interview Appointment: 23rd March 2017 9:00 am IST at U.S Consulate, near Gemini Circle, Chennai, India

Dressed in formals, I reached the U.S Consulate office approximately 45 minutes prior to my appointment with all the required documents. I joined the queue on the footpath besides the road for entry to U.S Consulate. After security check and verification outside, we were let inside the compound only to undergo detailed security check again inside. After this we were led to a long  hallway where people were directed to two different lines based on type of VISA. I was directed to a different waiting area on the opposite side of the two queues in the hallway and asked to arrange my documents as per Checklist provided for Document verification. I realized this was being done only for L1 applicants. After 15 minutes or so, an officer arrived and asked all of us seated in the waiting area to proceed for document verification. After our documents were verified, we were asked to join one of the two queues from where we proceeded to the main building for VISA Interview.
After standing in the queue for 20-30 minutes, we were let inside the main building. 
The main building was like a presidential fort guarded by several commandos and private security.
This building had several tiers of security and it seemed like I was in one of the safest places on Earth. Anybody would have a tough time sneaking in before being shot or tazed.

Once inside the building, I could see several applicants standing in different queues. While I was wondering if I had to go though all these queues before my final interview, a guard directed me to a waiting area for L1 applicants. I sat there looking at the other applicants who were waiting as anxiously as I was, without knowing what to expect next. In no time, we were directed to a window for ID verification and payment of Fraud Prevention and Detection Fee. After I paid my fees and had my photo and biometrics verified, I was directed to wait in the main hall with other applicants for my turn looking at the Monitor to see the window where I needed to go for my VISA Interview.
Within no time, it was my turn to go to Window 22 for my interview. I paced to the Window 22 and was greeted warmly by the VISA Officer (VO). 

Me : Good morning Sir. How are you?
VO : Very Good morning Sir.  Thank you.
         Please pass me your passport and all the documents.

Passed all the documents in the slot provided at the bottom of the window.

VO : So you work for XYZ?
Me : Yes Sir

VO : Do you know which Category of VISA you are applying for? L1A or L1B Blanket?
Me : L1B Blanket Sir

VO : L1B Blanket. That means specialized skill set. Please describe shortly your specialized skill.
Me : My specialized skill is knowledge of application ABC which is a proprietary application of XYZ and we are currently developing it.

VO : You are developing it?
Me : Yes Sir

VO : How long are you planning to go?
Me : 'N' Months
VO : Okay

VO think for few seconds and enter few things on the system. After few TENSE SECONDS which seemed like forever.

VO : You can relax. Your VISA is approved.  I am just doing some paper work. Allow me two minutes to stamp your documents.

Finally I had a big satisfied smile on my face and was jumping inside for I had got an approval to enter United States of America, the land of infinite Opportunities. 

VO handed all my documents back retaining one copy of I-129S, I-797 and Passport. I was told I would receive my Passport in 7-10 days with VISA in the Collection Center that I had entered while 
submitting my application.

This was my experience of L1B Interview. If you enjoyed reading this post and was helpful, please leave your comments for more such posts. 


Saturday, October 28, 2017

Applying for SSN in U.S.A with FNU or LNU

Most people are elated once their U.S VISA is approved. Why should they not be? They are traveling to the Land of Opportunities, the Land of Possibilities. Living in the U.S is a dream for many people across the world. For some it is the freedom which the land offers and for some it is the money, while some may want to live here for the overall experience. Most people have a hassle free experience while staying in the US. However, some not-so-fortunate immigrants face lot of challenges due to mismatch of names in their VISA and Passport. The most common problem is FNU or LNU.

FNU aka First Name Unknown or LNU aka Last Name Unknown are those people who have FNU/LNU stamped in their US VISA when either First Name or Given Name is blank in the Passport as both First Name and Last Name are mandatory for the US VISA. This will not pose a problem for those on short visit. However, for those intending to stay longer, their names in VISA is the beginning of all the problems. One may wonder why this is a problem when you have entered the country legally with a valid VISA. This is due to mismatch of names in PASSPORT and VISA. More often than not you may be addressed as "FNU" or "LNU".

If your name in the Passport for example is just "ABC" (First Name/Given Name), then the name in the VISA will be stamped as "FNU ABC" or "ABC LNU" indicating no first name or no Last Name. Due to this mismatch of names in the documents, applying for Social Security Number (SSN) and having it approved is a very big challenge. Hence many applicants end up waiting for several months or even have their SSN applications rejected several times in spite of furnishing all the necessary documents. It is not impossible to get SSN with FNU/LNU in VISA, however it is quite a challenge.

Many articles/posts/people suggest having the name split in the Passport or change the names in the Passport for the sake of getting an SSN and all other documents. It is best to have your name corrected in the Passport when in your Home country. However, you need not fret if you are already in U.S.A with this problem. Having faced the same problem and overcome it, I have found an easy way to have the SSN approved in short time without any additional expense or changing name in the Passport.

Once you have your SSN application submitted, your local SSA office may issue a letter indicating that your SSN may take up to 4 weeks against normal 2 Weeks. The letter would also mention that the application has been sent to Department of Homeland Security (DHS) for clearance. This is the first yellow flag that there has been a problem with your SSN application due to the details provided. You can ask the SSA officer to elaborate.

Immigration details at the port of Entry are saved in an USCIS application called SAVE, which is the Central application used by all Federal/State Government agencies for Immigrants verification including Social Security Office.
The status of every verification inquiry sent to SAVE application can be checked on the USCIS website - https://www.uscis.gov/save/casecheck

You just need one of the following valid IDs to check the SAVE Case details.
  • Verification Case Number
  • Alien/USCIS Number
  • I-94 Number
  • Citizenship Certificate Number
  • Naturalization Number
  • SEVIS Id
  • Passport
Once you submit the form with valid ID details, you will see the SAVE CASE details as below.


In case you see a tick mark against the inquiry from Social Security Application, It means that verification was successful and your SSN will be approved. If you see a clock which indicates Case Under Review against the SSA inquiry, then it means that there was a problem during verification of your Social Security Application with DHS. In such a scenario, the local SSA office where the SSN application was submitted needs to forward additional documents to DHS. Whenever this happens, the SSN may get delayed or rejected as SSA office only waits for 4 weeks for clearance from DHS before rejecting the application. In case you do not see the Case being approved on SAVE even after 2 weeks of submission of the SSN application, you can call the SAVE office for manual verification of the same. You will need the SAVE Case Verification number pertaining to your SSN case for manual verification. This can be obtained by clicking on View Case button on the form above. The DHS officer will ask some basic details on the submitted documents to verify the applicant and will clear the application on SAVE, post which your SSN application will be approved.

SAVE Office Contact Details :  +1 888-897-7781 , then Select Language : English/Spanish--> Provide Case Verification number or select I don't know or Dial * --> Dial (1) or Say Contest --> DHS or Dial 1--> Speak to a Representative

Speak to DHS officer and provide SAVE Case Verification number and any other details as requested. Mention that you are calling as your SSN application is not approved and request them to clear your case. Once your case is approved on SAVE, you will receive your SSN via mail in approximately 2 weeks.

Note : SAVE Office number is the same number as I-9 verification number for Employees. Please check the link https://www.uscis.gov/i-9-central/about-form-i-9/e-verify-and-form-i-9 for the latest number.

Hope this article helped. Please leave your comments if this post helped you and want to see more such posts.

Disclaimer: The information in this blog post (“post”) is provided for general informational purposes only, and may not reflect the current law in your jurisdiction. No information contained in this post should be construed as legal advice nor is it intended to be a substitute for legal counsel on any subject matter. No reader of this post should act or refrain from acting on the basis of any information included in, or accessible through, this Post without seeking the appropriate legal or other professional advice on the particular facts and circumstances at issue from a lawyer licensed in the recipient’s state, country or other appropriate licensing jurisdiction.